




Silicone potting cure inhibition is a failure of the curing reaction, often investigated when material remains gummy at a contact surface while a separate sample cures. Sticky potting is not automatically inhibition: incorrect preparation, an unsuitable cure schedule, or a moisture-curing sealant used in a deep cavity can produce a different problem. Identify the exact material and compare controlled specimens before changing temperature or adding curing agent.
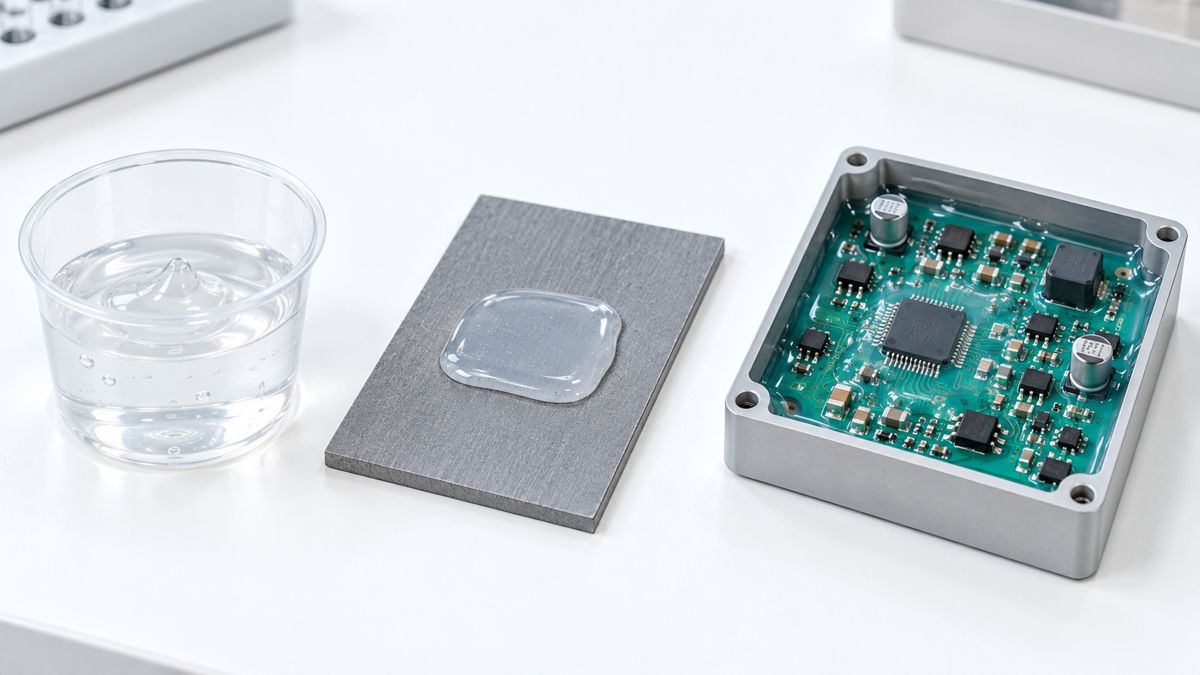
Why is silicone potting still sticky?
Start by describing what you can observe. Is the entire batch liquid, a thin interface gummy, the surface merely high-friction, or the center soft beneath a cured skin? Record the location and elapsed time without turning the observation into a confirmed cause.
The Momentive RTV guide distinguishes moisture-dependent condensation curing from addition curing and describes catalyst inhibition in addition-cure grades. A surface that has skinned over is not proof of through-cure. The chemistry on the product documentation matters more than the generic word silicone.
In a community discussion about tacky silicone, participants disagreed about whether the surface was actually uncured. That uncertainty is useful: compare a suspect specimen with an approved reference using the material supplier’s evaluation method. Do not diagnose a production assembly by touching it with a bare finger.
Cure inhibition vs incomplete mixing: what is different?
| Observation | Hypothesis to investigate | Next discriminating check |
|---|---|---|
| Control sample cures; one contact interface stays gummy | Contact incompatibility or contamination | Compare isolated patches on each actual contact material |
| Both control and assembly remain uncured | Preparation, material condition or cure exposure | Verify kit identity, measured quantities, mixing record and actual temperature |
| Uneven streaks or pockets occur in several specimens | Nonuniform preparation, with other causes still possible | Review dispensing and mixing; repeat with a documented homogeneous preparation |
| One-part moisture-cure sealant has a skin over a soft interior | Section depth and access to moisture | Check the product’s permitted geometry and cure-through guidance |
| Material is elastic but feels tacky without obvious liquid transfer | Surface feel may be confused with incomplete cure | Use a supplier-approved comparison method and reference specimen |
These patterns overlap. A control can share the same contaminated tool as the assembly; a small specimen can reach temperature before a filled housing. A passing cup narrows the investigation, but does not clear every process variable.
For a product-specific example, the Momentive RTV615 family data sheet identifies certain rubbers, sulfur-containing materials, amines and particular cured RTV materials as possible inhibitors. It recommends patch evaluation and requires matched kit components with thorough mixing. Those instructions support testing actual interfaces; they do not establish that every rubber or every solder flux inhibits every silicone.
How do you run a silicone contact test?
Use this as an investigation plan to agree with the material supplier and responsible process engineer. It is not a universal acceptance test or a claim of a validated production recipe.
- Hold the affected material and units. Keep lot identities, photos and the existing process record. Isolate power and follow the assembly’s safe handling procedure before investigation.
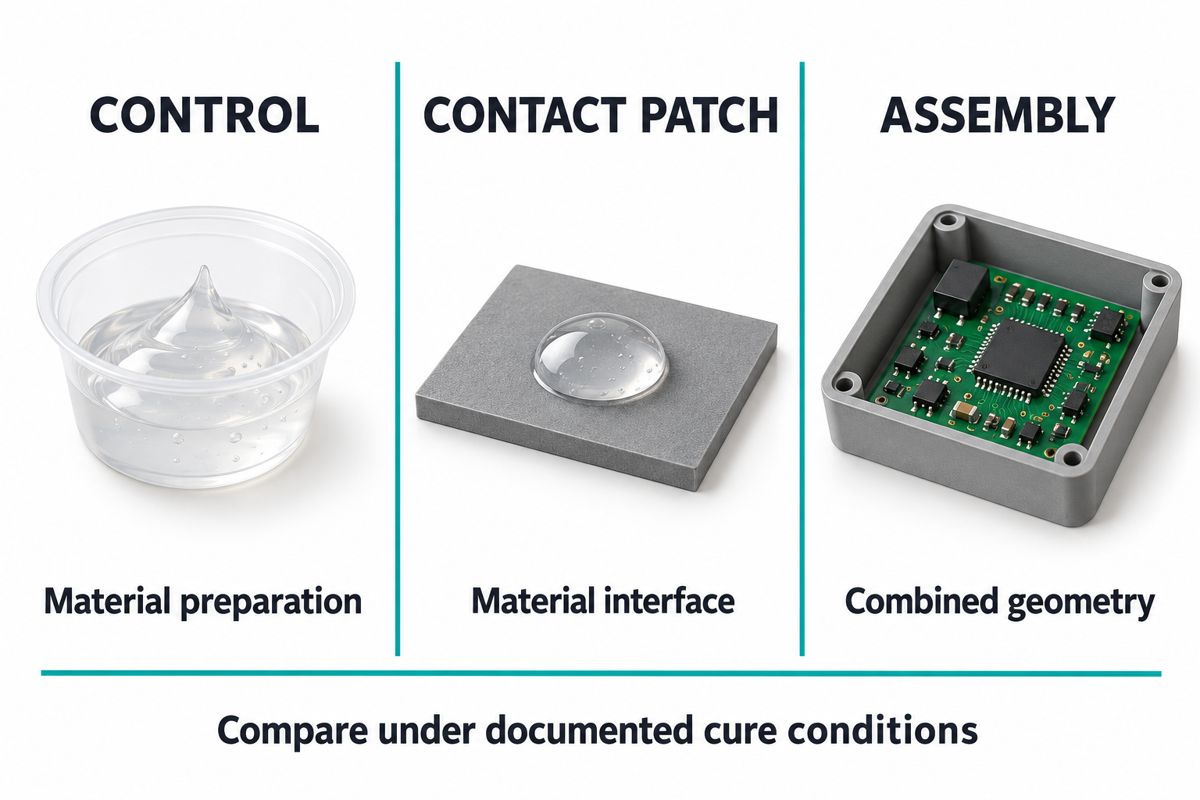
- Prepare a documented control. Use the correct kit, quantity basis and approved mixing method. Choose a container already shown compatible with the compound. Record actual quantities, mix start, dispensing end and temperature.
- Test contact materials separately. Include the actual enclosure, cable insulation, adhesive, coating and fixture materials that touch the compound. Use identified coupons or representative spare parts. Keep specimen geometry and exposure comparable where practical.
- Add a representative assembly specimen. This checks combinations and geometry that isolated coupons omit. Do not use a valuable production unit as the first compatibility experiment.
- Apply one approved cure schedule. Record the temperature history relevant to the specimens. An oven setting alone cannot demonstrate equal exposure in a thin patch and a deep housing.
- Inspect and repeat the informative comparison. Document the interface and bulk separately. When one material is implicated, compare an approved replacement or preparation change while holding other variables fixed.
For example, suppose a retained sample and enclosure patch cure, but a cable-contact patch remains gummy. The next useful action is a controlled cable-material comparison, not an unexplained increase in oven temperature. If all specimens fail, return to preparation and exposure before blaming the cable.
Changing an adhesive or adding a barrier layer also changes the assembly. Recheck adhesion, electrical requirements and environmental performance before release. Bubble control remains a separate investigation; see PCB potting bubble checks when the material cures but contains voids.
Which SYLGARD 184 parameters matter before a cure trial?
Dow’s SYLGARD 184 product page provides the following named-product example. It is not a recommendation or a PCBtry process specification.
| Property | Published value | What to verify |
|---|---|---|
| System / ratio | Two parts; 10:1 | Confirm weight or volume basis in current instructions; the displayed page does not specify it |
| Working time | 78 minutes at 25°C | Not the time to complete cure |
| Room-temperature cure | 48 hours at 25°C | Validate actual specimen conditions |
| Heat-cure examples | 35 minutes at 100°C; 20 minutes at 125°C; 10 minutes at 150°C | Not permission to expose every populated assembly to those temperatures |
| Viscosity / hardness | 3,500 mPa·s / 43 Shore A | Typical values; displayed entries give no tolerance or complete test conditions |
Obtain the current TDS, SDS and applicable lot requirements before establishing limits. Do not convert typical values into guaranteed acceptance criteria, or transfer a different silicone’s mixing and cure recipe to this product.
What should a cure-investigation record contain?
Copy this worksheet into the trial record. Put an actual value or an explicit unknown in each field. A blank field should not silently become an assumed process condition.
| Record | Evidence to attach | Decision supported |
|---|---|---|
| Compound and kit | Product, component lots, expiry, storage, TDS revision | Whether the intended material was used |
| Preparation | Quantity basis, actual quantities, equipment, sequence and times | Whether the preparation can be repeated |
| Contacts | Material identities, cleaning, drying, coatings, gloves and tools | Which contact change deserves a trial |
| Exposure | Specimen dimensions, positions and measured temperature history | Whether comparisons had equivalent conditions |
| Outcome | Bulk/interface observations, reference comparison, photos and test method | What actually improved and what remains unknown |
| Release | Repeat evidence, required electrical/environmental checks and approval owner | Whether a process change is qualified |
Keep the original baseline beside the changed trial. If cleaning, cable material and cure temperature all change together, a successful result does not tell the next operator which change was necessary. Record the smallest informative comparison, then broaden validation to the finished assembly.
Successful curing alone also does not establish mechanical reliability. Review potting thermal-stress considerations when materials or cure conditions change.
Can an uncured potted PCB be recovered?
Recovery is a disposition decision, not simply a cleaning task. Preserve an investigation sample before removal. Ask the product owner and material supplier whether an approved removal and reapplication process exists for the assembly.
A solvent acceptable for a loose metal coupon may damage connectors, labels, coatings or sensitive components. Do not adopt a forum solvent recipe or pour fresh compound over an unexplained gummy interface. Removal can also damage joints or leave inaccessible residue.
Define what will demonstrate restoration: material removal in the required areas, compatible preparation, a repeat cure check and the product’s specified electrical and environmental evidence. If those cannot be established, replacement may be the controlled outcome. A board that powers on is not proof that its insulation or long-term protection has been restored.
Silicone potting cure FAQ
Why does silicone cure in the cup but not against the PCB?
Investigate contact materials and preparation at the affected interface. Use separate patches and comparable cure exposure. The observation supports a contact investigation but does not, by itself, prove a particular contaminant.
What if even the leftover silicone in the cup does not cure?
Check the material identity, shelf and storage condition, quantity basis, mixing and cure exposure first. The control itself must use compatible tools and a compatible container. Do not infer a PCB-specific problem when the control fails too.
Does a tacky surface always mean the silicone is uncured?
No. Surface feel alone is ambiguous, especially with soft formulations. Use the manufacturer’s evaluation method and an approved reference. Record actual transfer, deformation or other specified observations rather than a subjective sticky/not-sticky label.
Can a 3D-printed fixture interfere with silicone curing?
It is a contact material to evaluate, including its post-processing residues and any release coating. Do not classify every printed material as compatible or incompatible. Test the exact material and preparation used in the fixture.
Should I add more curing agent to fix a failed batch?
Not without explicit product-specific instructions. Extra agent does not establish a correct, homogeneous formulation or remove contact incompatibility. Hold the batch and investigate; prepare a fresh controlled specimen when directed.
Will heating fix silicone cure inhibition?
Do not assume so. Heating may accelerate an approved cure process, but it is not proof that a contact-related problem has been removed. Verify the compound’s schedule and the complete assembly’s thermal limits before any trial.
Why is one-part silicone hard outside but soft inside?
A moisture-curing product can form an outer skin before its interior cures. Check section depth and exposure requirements. For example, MG Chemicals 1035 guidance identifies a 6 mm section limit and suggests other cure systems for deeper sections. That is product guidance, not a universal limit for all silicones.
Can I remove the failed compound and repot the board?
Only under an approved recovery process with defined acceptance checks. Include component and solvent compatibility, residue removal and required retesting. If critical regions cannot be inspected or restored, do not release the board on appearance alone.
Request an assembly process review
For a PCB assembly project, send the BOM, assembly drawing, enclosure section, exact compound TDS, contact-material list and control-versus-assembly observations through PCBtry’s contact page. Include the worksheet and identify which conditions remain unknown.
Ask the team to confirm the available assembly scope and any specialist material testing required before quotation. A documented compatibility question is more useful than an unsupported request to make the silicone cure faster.



0 Comments