




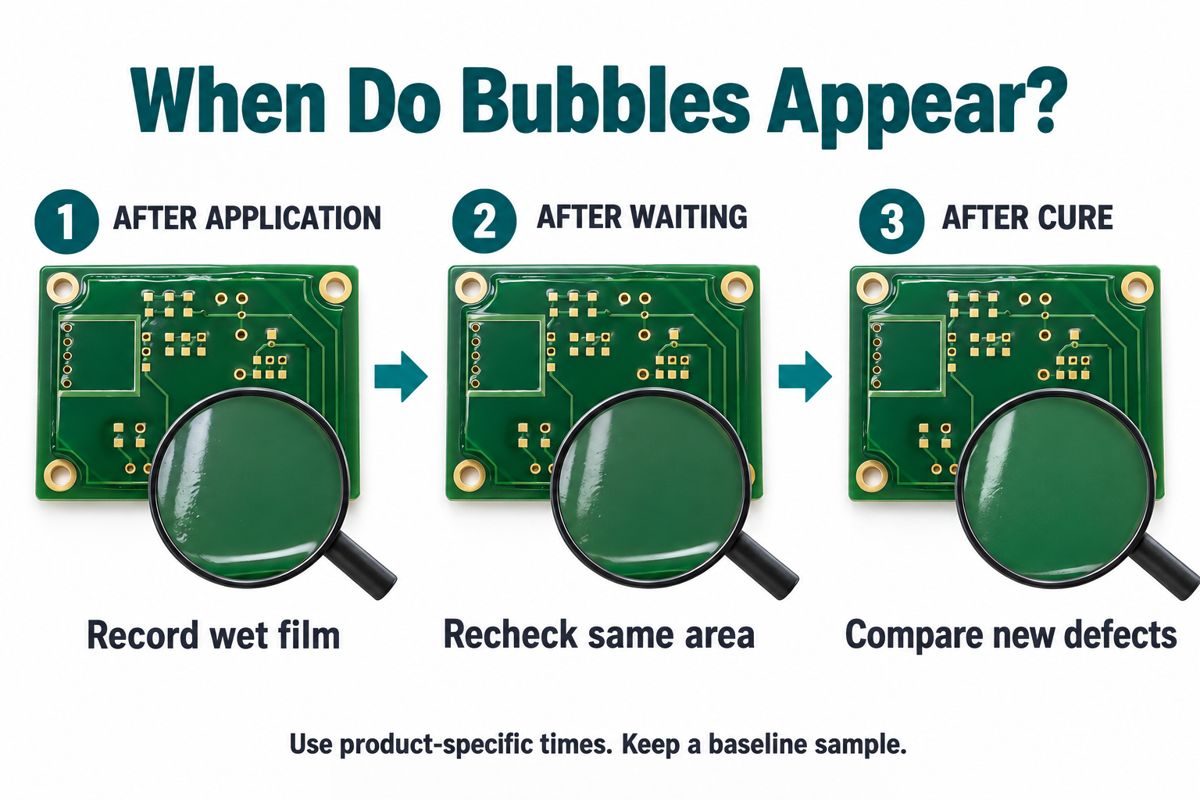
Conformal coating bubbles can come from air introduced during application, solvent that cannot escape, or a drying process that closes the surface too early. The useful first question is not simply which thinner to add: when did the bubbles first appear? Record the wet film, the film after its waiting interval, and the finished coating before changing the recipe.
This guide concerns thin protective coatings on PCB assemblies, not bulk potting resin. It provides a way to organize a defect investigation; it is not an acceptance standard or proof that a coated assembly is waterproof.
Why Does Conformal Coating Bubble?
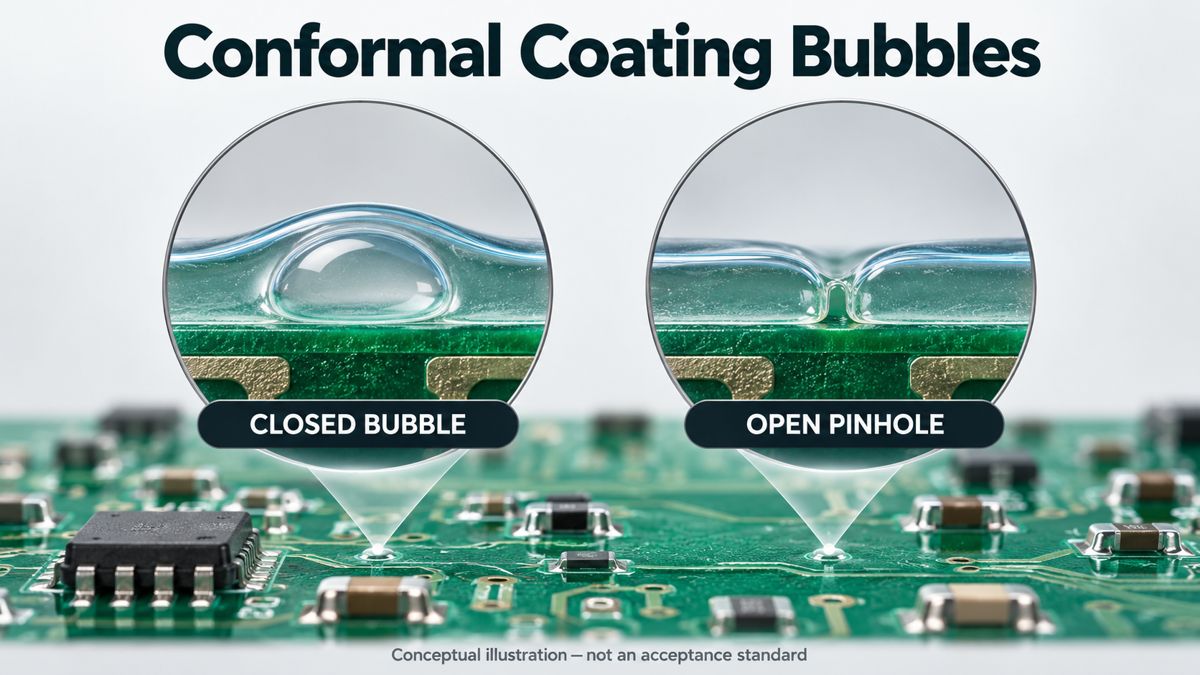
A bubble indicates gas within or beneath the film, but appearance alone does not identify its source. MG Chemicals’ defect guidance identifies excessive application pressure, overly rapid drying and excessive film build as possible contributors. These mechanisms suggest different corrective trials, not one universal fix.
For example, a coupon already showing bubbles immediately after application points toward the liquid or deposition stage. A smooth wet coupon that develops cavities only later asks a different question about the drying sequence. Treat these as hypotheses to test. A photograph taken only at final inspection loses that distinction.
Keep the affected lot identified and separate from accepted material. Record the coating product and form, batch, thinner, equipment setup, board orientation and the first inspection stage showing the defect. Do not change pressure, dilution and cure temperature together: an improved sample would then leave you unable to explain which change helped.
Bubbles vs Pinholes: What Is the Difference?
A closed bubble has a film over a cavity; a pinhole is an opening. A bright dot in a photograph is not enough to distinguish either from a particle or a reflection. Examine the same location with suitable magnification and lighting before assigning a defect name.
| Observed feature | Question to resolve | Next evidence |
|---|---|---|
| Rounded raised area with an apparently intact top | Is there a cavity, or is this deposited material? | Angled views and a representative inspection sample |
| Small opening with visible underlying surface | Does it interrupt required coverage? | Location against the coating drawing and acceptance criteria |
| Coating pulled away into a circular margin | Is this dewetting rather than a burst bubble? | Compare wet-stage images and surface preparation records |
| Bright speck that changes with illumination | Is it reflection, contamination or a real film defect? | Repeat inspection from another angle; avoid diagnosis from one image |
The consequence depends on location and the approved requirement. An opening over a required protected conductor is not equivalent to a cosmetic feature in a noncritical area. Do not invent a universal allowable bubble diameter. If your acceptance document is silent, obtain a disposition from the responsible quality or design authority before release.
What Does the Timing of the Bubbles Tell You?
Follow one marked location through the process. Timing narrows the investigation without pretending to establish root cause.
- Immediately after application: compare a flat witness coupon and an assembly. If both show the defect, investigate the common liquid/application conditions first.
- After the specified waiting interval: photograph the same locations again. Note whether existing bubbles disappear, persist or turn into openings.
- After the specified cure: record newly appearing defects separately from defects already present. Review the actual waiting time and temperature history rather than just the oven setting.
- After the agreed environmental test: keep these observations separate from initial workmanship. A test-induced change deserves its own investigation.
A flat coupon cannot reproduce every shadowed corner or component gap. If only assemblies fail, keep geometry in the investigation instead of concluding that the coating material is bad. If the supplier proposes a process change, repeat it on the representative assembly as well as the coupon.
Which 419D Liquid Parameters Affect Bubble Prevention?
The following example is MG Chemicals 419D Liquid, not its aerosol or another silicone coating. Its July 2025 technical data sheet, version 4.0, supplies these starting constraints.
| Parameter | Published value | Process implication |
|---|---|---|
| Viscosity at 25 °C | 115 cP | Record material temperature when comparing trials. |
| Recommended film thickness | 25–75 µm | Check the finished film; more material is not automatically better. |
| Minimum recoat interval | 3 minutes | Do not compress the interval between spray passes. |
| Room-temperature wait before heat cure | 10 minutes for the stated spray/dip procedures | Include this stage in the production log. |
| Cure options | 24 hours at room temperature; or 65 °C for 30 minutes after the stated wait | Confirm assembly compatibility before choosing heat. |
These are manufacturer recommendations/listed properties, not a supplied tolerance band or a guarantee of bubble-free production. Use the current sheet for the complete method. Do not transfer the recipe to 422C, an aerosol, or a UV-curing chemistry. For measurement planning, see the conformal coating thickness guide.
How Do You Run a Controlled Coating Trial?
Keep a baseline sample and change one suspected factor within the approved process window. The objective is to identify a repeatable improvement, not merely produce one attractive board.
Prepare representative samples with traceable cleaning and handling. Keep liquid identity, board type, inspection lighting and observation locations fixed unless one is the factor under investigation. Follow the material supplier’s method; the application guide explains why application technique and waiting stages matter. Do not substitute aggressive brushing for a controlled deposition method.
| Trial record | Baseline | Controlled comparison |
|---|---|---|
| Sample and marked locations | Assembly/coupon ID; inspection map | Equivalent geometry and inspection map |
| Single factor being evaluated | Actual recorded setting | Approved revised setting; all other settings retained |
| Wet-stage observation | Photo and defect locations | Same inspection timing and lighting |
| After waiting / after cure | Separate observations at both stages | Record new defects separately from persistent ones |
| Release evidence | Coverage, thickness and required tests | Same criteria; record disposition and approver |
Illustrative interpretation: if a controlled longer wait within the approved procedure eliminates new post-cure defects but leaves the original wet-stage bubbles unchanged, you have evidence of two different behaviors. Do not report that the longer wait solved every source of bubbles. Repeat the comparison before changing the production instruction.
Can You Repair Bubbles by Adding Another Coat?
Another coat is not an automatic repair: it can conceal a cavity without showing whether required coverage has been restored. Keep the board unpowered and obtain a material-compatible rework instruction.
First identify whether the film is still wet or cured, whether the defect is open, and which protected features are involved. Then choose the authorized local repair or removal route, protect adjacent parts, complete the specified cure, and repeat the required inspections and electrical tests. Record the repair area so a later reviewer can distinguish it from the original process.
Do not use a lighter, flame or improvised heat source to pop bubbles. The 419D Liquid safety data sheet identifies a flammable liquid/vapour hazard. Use appropriate ventilation, protective equipment and approved facilities. A household oven is not a substitute for equipment suitable for solvent-bearing work.
What Should You Send for a Coating Process Review?
Send evidence that reproduces the failure, not just a close-up of the final surface.
- Assembly revision, coating drawing, protected regions and acceptance criteria.
- Product name, liquid/aerosol form, batch and technical-sheet revision.
- Application settings, thinner identity if used, number of passes and elapsed waiting times.
- Temperature history and photos of the same locations at each stage.
- Witness-sample results, thickness records and proposed rework limits.
For a new PCB assembly project, include the BOM and assembly files with this pack. Contact PCBtry to discuss the required coating controls and validation evidence before approving production. The material example above is not a claim that a particular coating is used on every PCBtry order.
Frequently Asked Questions
Are small conformal coating bubbles always a rejection?
No universal rule can be inferred from size alone. Location, film continuity, the specified protection and contractual acceptance criteria matter. Record the defect and obtain an approved disposition rather than treating a visually small feature as harmless.
Can I pop a cured bubble with a toothpick?
Puncturing it creates an opening and does not establish an acceptable repair. Use a documented rework process for the exact material, then reinspect. Avoid sharp improvised tools near fine conductors and components.
Will a thicker coating prevent bubbles?
Not necessarily. Excess film build is one possible contributor to solvent entrapment. Verify the specified film requirement and application sequence instead of adding layers until the surface looks smooth.
Why do bubbles appear only after heating?
Compare wet-stage images with the finished sample and review the waiting interval and real temperature history. Post-heat appearance is a useful clue, not proof of a single mechanism. Test a controlled change on representative samples.
Can I thin the coating with rubbing alcohol?
Do not assume that a cleaning solvent is an approved thinner. Follow the exact product’s technical sheet and check compatibility with the assembly. Water content and an unapproved solvent blend can introduce another uncontrolled variable.
Can I power the board when the coating feels dry?
Handling readiness and completion of the prescribed cure are different decisions. Complete the product-specific process and required inspection/testing before energizing the assembly; a dry surface does not prove conditions underneath it.
Does UV fluorescence prove that there are no pinholes?
Use fluorescence as a coverage aid where the product supports it, not as a stand-alone proof of film thickness or electrical performance. Inspect suspect areas appropriately and apply the specified acceptance and test plan.
Does bubble-free coating make a PCB waterproof?
No. Connectors, openings, enclosure design and the actual exposure still matter. A smooth coating is not evidence of an ingress rating or permission to immerse the assembly. Validate the complete product against its intended environment.



0 Comments