




What Does the PCB Packaging Process Need to Protect?
The PCB packaging process prepares finished boards or assemblies for storage and shipment by controlling handling damage, contamination, moisture exposure and, where applicable, electrostatic discharge. It includes product release, protective-material selection, packing, sealing, identification and final shipment checks. Here, packaging means shipping protection, not semiconductor package fabrication.
A bag alone is not a complete packaging plan. Start with what is being shipped, how it can be damaged and what the receiver needs to know. Bare boards and populated assemblies can need different protection, even when their outlines are identical.
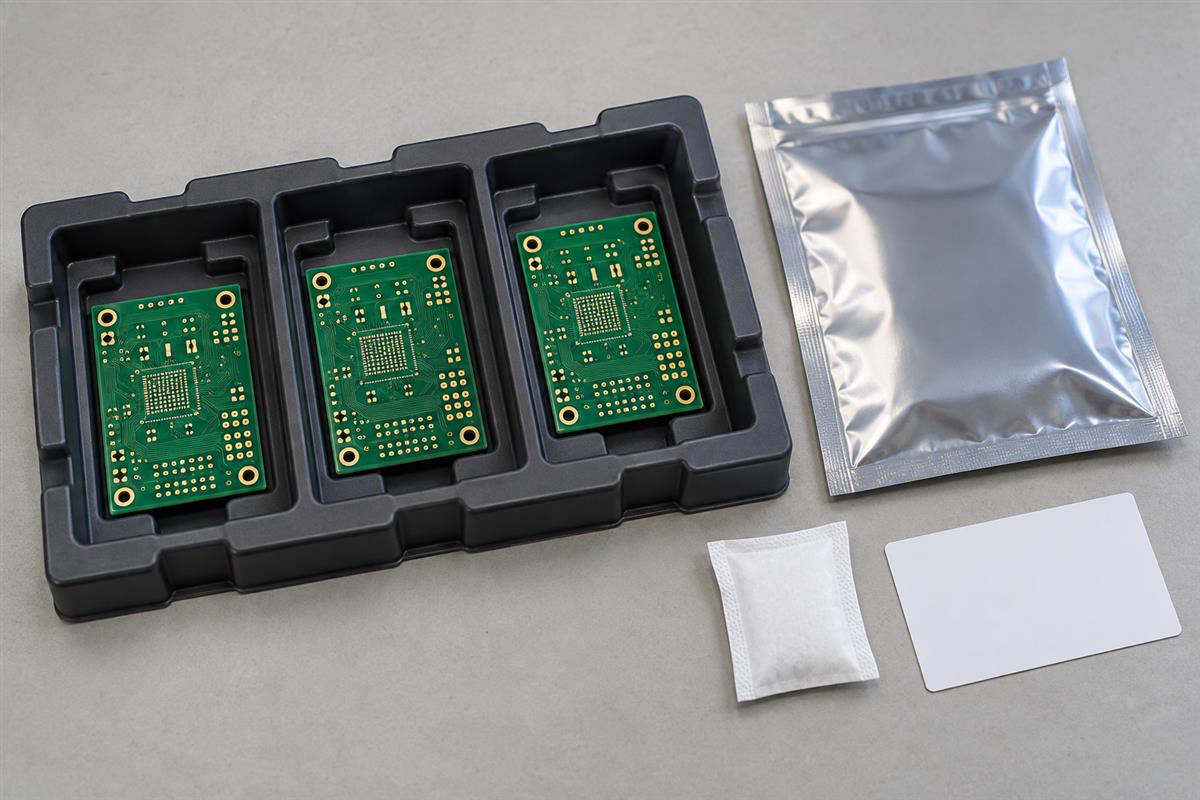
| Shipment | Main questions | Evidence to request |
|---|---|---|
| Bare rigid boards | How will finishes, edges and flatness be protected? | Approved separators, pack quantity and storage instructions |
| Populated assemblies | Are components ESD-sensitive, tall, fragile or sharp? | ESD packaging specification and supported-board arrangement |
| Flexible circuits | What bend and contact conditions are acceptable? | Support geometry and handling restrictions from the design owner |
| Moisture-controlled product | What barrier, drying state and opening instructions are required? | Approved moisture-control procedure and pack records |
The packing operation should preserve an accepted product, not conceal an unresolved defect. Do not pack boards with uncertain identity, unresolved contamination or incomplete release status just because shipment is due. For broader environmental protection after packing, see the guide to protecting a PCB from moisture.
How Does the PCB Packaging Process Work?
Use a controlled sequence: release the product, prepare the approved materials, support and separate the boards, apply the required barrier, verify the closure, then label and protect the shipment. Keep the same revision and lot identity through every step.
1. Confirm the product is released for packing
Check the part number, revision, quantity and inspection status against the work order. Identify any special storage, cleanliness or handling requirements. This prevents a correctly packed but incorrect revision from reaching the customer. Keep the release record linked to the shipment rather than relying on an operator’s memory.
2. Prepare the packing station and approved materials
Remove unsuitable loose debris and prepare the specified trays, separators, bags, labels and outer protection. Where exposed ESD-sensitive assemblies are handled, use the established ESD-protected process and approved contact materials. A protective bag does not correct damage caused before the assembly enters it.
Inspect packaging for punctures, tears, dirty contact surfaces and unsuitable dimensions. If the approved material is unavailable, stop for an authorized alternative; choosing a similar-looking bag can change its protective function.
3. Separate and support the boards
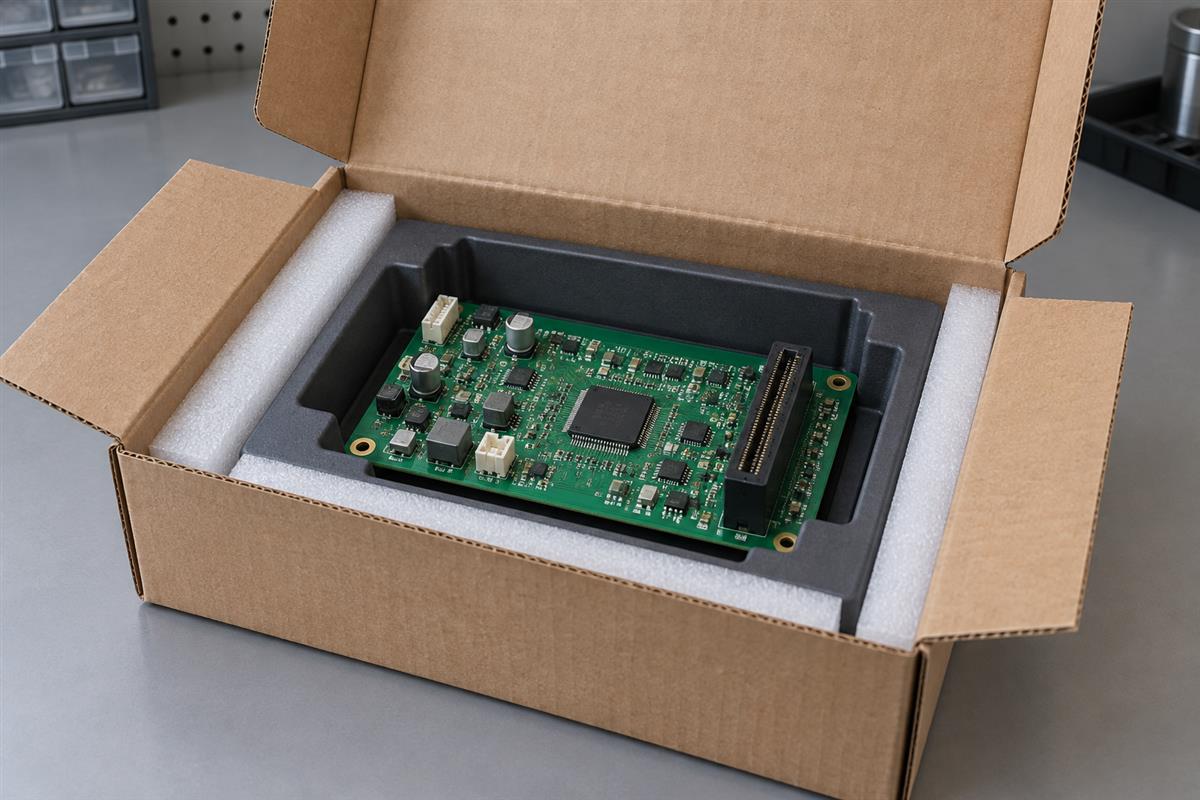
Prevent board-to-board rubbing and avoid placing stack weight on components or exposed contacts. Use the approved compartment, spacer or support arrangement. For an assembly with a tall connector, the connector should not become the load-bearing point simply because it is the highest feature.
Check that the product remains retained without excessive bending or pressure. Save a pack-layout photograph for first-article approval when geometry is unusual. A loose fit risks movement; a forced fit risks damage during packing or unpacking.
4. Apply the required ESD and moisture protection
Use the specified protective system, not just a generic bag. For a moisture-controlled pack, confirm the product condition and follow the approved barrier-bag, desiccant and humidity-indicator requirements. Do not guess desiccant quantity from board count; follow the packaging specification and material supplier’s guidance.
Do not automatically bake every shipment before sealing. Any drying process must be compatible with the board finish, assembly and components, and must have an approved purpose and procedure. Likewise, vacuum packing is a selected process, not a universal requirement; avoid a method that pulls packaging against fragile or sharp features.
5. Seal and verify the completed inner pack
Follow the chosen bag’s closure instructions and the validated packing procedure. Inspect the sealing area for folds, trapped items and contamination, and use the defined seal acceptance method. Visual neatness alone is not a measured barrier-performance result.
If the pack is damaged or must be reopened, follow the approved repacking rules. Record the event where exposure history matters. Placing new tape over a torn bag is not automatically equivalent to restoring the original protective system.
6. Identify, cushion and release the outer shipment
Apply labels that preserve part, revision, lot and quantity traceability. Add the necessary handling and storage instructions, then use an outer package sized and supported for the expected distribution route. Keep loose carton material outside any required clean or protected inner enclosure.
Before release, compare the actual pack with the approved arrangement, check the carton contents against the packing list and record the final count. Qualification of the shipment design and routine checks of each packed unit are different tasks; agree when transport testing is needed rather than claiming a carton is proven by appearance.
How Do You Choose Bags, Trays and Moisture Controls?
Choose each material for its documented function. Static control, moisture resistance and mechanical cushioning are separate properties; color, gloss and thickness do not establish all three.
The EOS/ESD Association’s control guidance distinguishes packaging functions and identifies discharge shielding as necessary for protecting ESD-susceptible items outside a protected area. Do not assume that anything described as “antistatic” provides that shielding.
| Material or feature | Purpose to verify | Common selection error |
|---|---|---|
| ESD-protective packaging | Properties appropriate to the item and handling environment | Buying by color or the word antistatic alone |
| Moisture-barrier bag | Specified moisture protection with an appropriate closure | Assuming an ordinary shielding bag is also an adequate moisture barrier |
| Desiccant | Absorb moisture within the approved dry-pack system | Adding an arbitrary packet to a leaking enclosure |
| Humidity indicator card | Indicate conditions according to its own instructions | Treating it as a dryer or universal product moisture test |
| Tray or separator | Control contact, movement and support geometry | Letting components carry stacking pressure |
| Outer cushion and carton | Protect the packed product during handling and transport | Assuming inner-bag protection prevents crushing |
Desco’s moisture-packaging guidance describes the complementary roles of barrier packaging, desiccant and indicators. Use the actual selected products’ instructions. An indicator reading does not directly measure how much moisture is inside a laminate or component, and one card’s interpretation should not be applied to a different card design.
What Should Receiving Inspect Before Opening and Using the Boards?
Check shipment identity and package condition first, then open under the required handling conditions. If a protection system appears compromised, hold the affected product for a documented decision rather than immediately feeding it into production.
| Observation | Immediate action | Evidence for disposition |
|---|---|---|
| Crushed or wet carton | Separate the shipment and document condition | Carton and inner-pack photographs, affected quantities |
| Torn bag or doubtful seal | Hold affected packs; avoid unsupported claims of dryness | Pack identity, damage location and known exposure history |
| Indicator outside its acceptance instructions | Apply the approved moisture-handling procedure | Card type, reading and opening time where relevant |
| Wrong revision or unclear lot | Stop material release until identity is resolved | Labels, work order and packing-list comparison |
| Movement damage or bent leads | Segregate and request inspection/disposition | Product condition and original support arrangement |
Receiving example: a carton contains four sealed packs of 25 boards, but one inner bag is punctured. Record all four pack identities and isolate the affected 25 for assessment; do not silently mix them with the others. Whether the other packs can be released depends on the inspection findings and acceptance procedure, not simply on being in different bags.
Maintain storage and exposure information needed for subsequent assembly. Eurocircuits’ receiving and storage description provides a manufacturer example of controlled material handling; it is not evidence that every supplier uses the same process. Confirm the actual arrangements for your order.
What Packaging Requirements Should a Buyer Send?
Send a packaging specification that describes the product, protection and receiving workflow, not merely “pack well.” This lets the supplier quote and confirm a repeatable arrangement.
- Part number, revision, board or assembly dimensions, quantities and lot-separation rules.
- Fragile features, exposed contacts and any restrictions on stacking or bending.
- Required ESD protection and the handling environment at both ends.
- Required moisture controls, storage expectations and opening/repacking instructions.
- Approved inner-pack quantity, tray layout, separator and contact-material restrictions.
- Label fields, traceability requirements and documentation to travel with the shipment.
- Distribution conditions and any agreed transport qualification or customer packing standard.
- Acceptance criteria, photographs or records required, and handling of packing deviations.
For a PCB assembly order, include an assembly drawing so the packing proposal can account for tall connectors and other vulnerable features. Request approval of any proposed substitution before shipment, especially when it changes the protective materials or support geometry.
FAQ
Is PCB packaging the same as chip packaging?
No. This process protects boards and assemblies for storage and transport. Chip packaging builds the component enclosure and connections and is a different manufacturing subject.
Must every PCB be vacuum packed?
No. Select the method from the product and agreed protection requirements. Vacuum is not a substitute for barrier properties, and fragile assemblies may need a different supported arrangement.
Are ESD shielding bags always moisture barriers?
No. Verify the selected bag’s specified properties. A product can provide one protective function without meeting the requirements for another.
Does every bare board need the same packaging as a populated assembly?
No. Assess the actual product and customer specification. Populated boards introduce component sensitivity and mechanical features that an unpopulated board may not have.
Can a humidity card dry the contents?
No. It is an indicator, not a moisture absorber. Use the specified moisture-control system and interpret the card according to its instructions.
Can boards be stacked directly together?
Only when the approved packing method permits it without damage. Otherwise use appropriate separation or individual support, especially where surfaces or components could rub or bear load.
What should happen after a bag is opened?
Follow the product’s handling, storage and repacking instructions. Record exposure where required and do not assume closing the bag resets any applicable handling limit.
Does a damaged package mean the boards must be scrapped?
Not automatically. Hold the affected product, document the condition and obtain a disposition based on inspection and applicable requirements. Neither immediate scrap nor unconditional acceptance is justified by the package alone.
To agree on packing before production, contact PCBtry with the board or assembly drawing, quantity and requirements above. Ask for the proposed pack layout, protective-material specifications and receiving instructions as part of the order review.



0 Comments