
Learning how to print a PCB board correctly is critical for achieving high-quality, functional circuit boards. This guide breaks down the entire process of how to print a PCB board, from design preparation to final printing, with actionable steps, industry examples, and solutions to common pain points. Whether you’re creating prototypes or production-ready boards, follow this guide to ensure accurate, reliable PCB printing every time.
What Do You Need to Print a PCB Board?
To print a PCB board, you need four core components: a finalized PCB design file (Gerber format), a compatible printer (inkjet or laser for prototypes, industrial screen printers for mass production), specialized printing materials, and post-printing tools for curing or processing.
Essential Tools & Materials
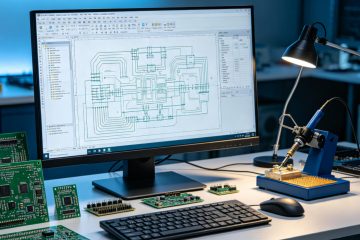
- PCB design software (Altium, KiCad, or CircuitMaker) to export Gerber files
- Printer: Inkjet (for small prototypes) or screen printer (for high-volume production)
- Printing materials: Solder paste, conductive ink, or PCB stencils (for precise component placement)
- Curing equipment (UV light or heat oven) to set the ink/paste
- Inspection tools (magnifying glass or AOI machine) to check print accuracy
How to Print PCB Board: Step-by-Step Process
When you print a PCB board, the process follows a clear, sequential flow—start with design preparation, then print setup, execution, and post-printing checks. Each step directly impacts the final board’s functionality, so attention to detail is key.
Step 1: Prepare the PCB Design File
First, finalize your PCB design in your chosen software and export it as Gerber files. Gerber files are the industry standard for PCB printing, as they contain all necessary details (traces, pads, holes) required by the printer.
Double-check the design for errors (e.g., short circuits, missing pads) using Design Rule Check (DRC) tools to avoid printing faulty boards.
Step 2: Choose the Right Printing Method
Select a printing method based on your production volume and precision needs. The three most common methods are inkjet printing (for prototypes), screen printing (for mass production), and laser printing (for high-precision boards).
Step 3: Set Up the Printer & Materials
Load the PCB substrate (e.g., FR-4 for rigid boards, PI for flexible boards) into the printer. Apply the appropriate printing material (solder paste for component mounting, conductive ink for traces).
Calibrate the printer to ensure alignment—misalignment will cause traces or pads to be off-center, leading to functional issues.
Step 4: Print the PCB Board
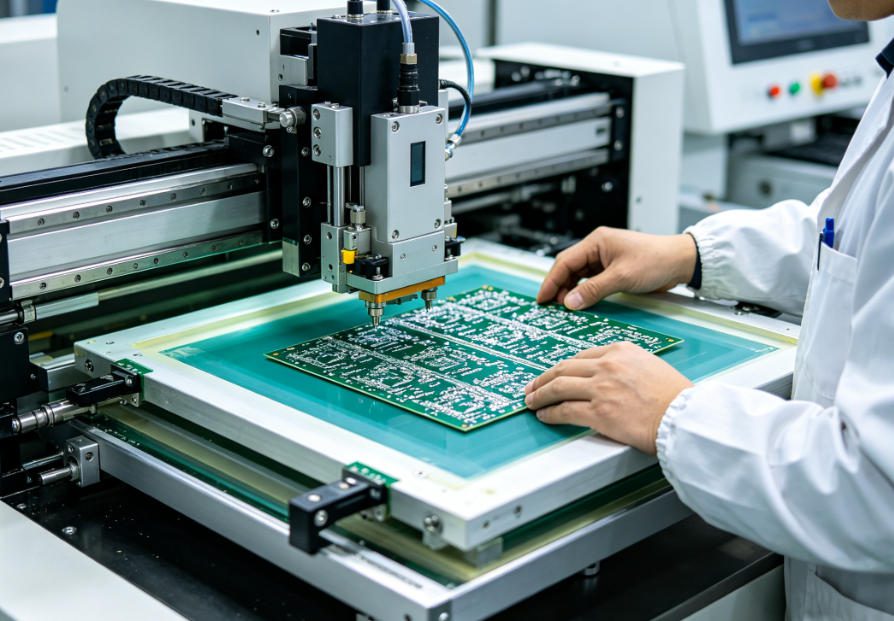
Initiate the print process. For prototypes, inkjet printers deposit conductive ink directly onto the substrate. For mass production, screen printers use stencils to apply solder paste evenly across the board.
Monitor the print in real time to catch issues like ink smudges or uneven paste application early.
Step 5: Cure & Inspect the Printed PCB
After printing, cure the board using UV light (for ink) or a heat oven (for solder paste) to set the material. Curing ensures the ink or paste adheres properly and conducts electricity as intended.
Inspect the board with a magnifying glass or Automated Optical Inspection (AOI) machine to verify print accuracy, trace continuity, and the absence of defects.
Which Printing Method Is Best for Your PCB Board?
The best method for printing a PCB board depends on your production volume, precision requirements, and budget. Below is a detailed comparison of the three most common methods to help you decide.
| Printing Method | Best For | Precision Level | Production Speed | Key Advantage |
|---|---|---|---|---|
| Inkjet Printing | Prototypes, small batches (1-50 boards) | Medium (0.1mm trace width) | Slow (1-2 boards per hour) | Low setup cost, ideal for quick iterations |
| Screen Printing | Mass production (100+ boards) | High (0.075mm trace width) | Fast (50+ boards per hour) | Consistent results, cost-effective for large volumes |
| Laser Printing | High-precision boards (medical, aerospace) | Ultra-high (0.05mm trace width) | Medium (10-20 boards per hour) | Extreme accuracy, ideal for complex designs |
How to Print PCB Board for Different Industry Applications
PCB printing requirements vary by industry, as each sector has unique needs for durability, precision, and environmental resistance. Below are four popular industries with specific examples of how to print a PCB board for their applications.
1. Consumer Electronics
Consumer electronics (e.g., smartwatches, Bluetooth speakers) require compact, high-precision PCBs. We print flexible PCBs using inkjet printing with PI substrates for smartwatch motherboards.
This method solves the problem of fitting PCBs into small, curved spaces while maintaining signal integrity for audio and sensor components.
2. Automotive Electronics
Automotive PCBs (e.g., ECU modules, BMS) need to withstand extreme temperatures and vibration. We use screen printing with high-temperature solder paste for ECU PCBs.
This ensures the printed traces and pads remain stable in engine bays, preventing connectivity issues in critical vehicle systems.
3. Industrial Control
Industrial control systems (e.g., sensor modules) require dust- and moisture-resistant PCBs. We print rigid FR-4 PCBs using screen printing with conformal coating-compatible ink.
This solves the problem of PCB degradation in harsh factory environments, ensuring reliable performance for real-time control systems.
4. Medical Electronics
Medical devices (e.g., endoscopes) need sterile, low-EMI PCBs. We use laser printing for small, high-precision PCBs with biocompatible materials.
This meets IEC 60601 standards, ensuring the printed PCBs are safe for medical use and do not interfere with sensitive diagnostic equipment.
How to Avoid Common Mistakes When Printing PCB Boards?
Most PCB printing failures stem from preventable mistakes. By addressing these common issues, you can ensure consistent, high-quality results when learning how to print a PCB board.
Common Mistake 1: Poor Design File Preparation
Fix: Always run a DRC check before exporting Gerber files. Ensure all traces, pads, and holes are correctly sized and aligned to avoid short circuits or missing connections.
Common Mistake 2: Incorrect Printer Calibration
Fix: Calibrate the printer’s alignment and material flow before each print run. Use test prints to verify that traces and pads are printed in the correct location.
Common Mistake 3: Using the Wrong Printing Material
Fix: Match the printing material to your substrate and application. For example, use conductive ink for flexible PCBs and high-temperature solder paste for automotive applications.
Common Mistake 4: Inadequate Curing
Fix: Follow the manufacturer’s guidelines for curing time and temperature. Under-curing leads to poor adhesion, while over-curing can damage the PCB substrate.
How to Print PCB Board with Precision (Pro Tips)
Achieving precise PCB printing requires attention to detail and small adjustments that make a big difference. These pro tips will help you master how to print a PCB board like an expert.
- Use high-quality stainless steel stencils for screen printing to ensure consistent solder paste application.
- Keep the printing environment clean and dust-free to avoid ink smudges or debris on the PCB.
- Test print on a spare substrate first to verify alignment and material flow before printing your final boards.
- Store printing materials (solder paste, conductive ink) in a cool, dry place to maintain their performance.
What Is the Difference Between PCB Printing and PCB Etching?
PCB printing and PCB etching are two distinct steps in PCB manufacturing, but they work together to create functional boards. Understanding the difference is key to mastering how to print a PCB board.
PCB printing deposits conductive material (ink, solder paste) onto the substrate to create traces and pads. PCB etching removes excess copper from the substrate to form the desired circuit pattern.
For most modern PCBs, printing is used to apply solder paste for component mounting, while etching is used to create the initial circuit traces on the copper-clad substrate.
How to Print PCB Board for Prototyping vs. Mass Production?
The process of printing a PCB board differs slightly for prototyping and mass production, as each has unique goals (speed for prototypes, consistency for mass production).
| Aspect | Prototyping | Mass Production |
|---|---|---|
| Printing Method | Inkjet printing (fast setup, low cost) | Screen printing (high speed, consistent results) |
| Production Volume | 1-50 boards | 100+ boards |
| Turnaround Time | 1-24 hours | 1-3 days (depending on volume) |
| Key Focus | Speed and flexibility for design iterations | Consistency and cost-effectiveness |
FAQ: Common Questions About How to Print PCB Board
Can I print a PCB board at home?
Yes, you can print a PCB board at home using an inkjet printer and conductive ink. This method is ideal for small prototypes and hobby projects. Use FR-4 or flexible PI substrates, and cure the ink with a UV light for best results.
What file format do I need to print a PCB board?
The standard file format for PCB printing is Gerber files. Most PCB design software (Altium, KiCad) can export Gerber files, which contain all necessary details (traces, pads, holes) for the printer.
How long does it take to print a PCB board?
Print time depends on the method and volume. Inkjet printing for prototypes takes 1–2 hours per board, while screen printing for mass production can print 50+ boards per hour. Curing time (30 minutes to 2 hours) is additional.
Why is my printed PCB board not conducting electricity?
The most common reasons are inadequate curing (ink or paste not set properly) or poor print alignment (traces not connected). Ensure you follow curing guidelines and calibrate the printer before printing.
Can I print flexible PCB boards?
Yes, you can print flexible PCB boards using inkjet or laser printing with PI (polyimide) substrates. Use flexible conductive ink to ensure the PCB can bend without breaking traces.
What is the minimum trace width I can print on a PCB board?
The minimum trace width depends on the printing method: inkjet printing (0.1mm), screen printing (0.075mm), and laser printing (0.05mm). Thinner traces require higher-precision equipment.
How to Ensure Your Printed PCB Board Meets Industry Standards?
Meeting industry standards is critical for ensuring your printed PCB boards are reliable and compatible with other components. Follow these steps to ensure compliance when learning how to print a PCB board.
Follow IPC Standards
Adhere to IPC standards (e.g., IPC-6012 for rigid PCBs, IPC-6013 for flexible PCBs) for print quality, trace width, and pad size.
Conduct Quality Inspections
Use AOI (Automated Optical Inspection) machines to check for print defects, trace continuity, and alignment. For critical applications, add electrical testing (e.g., flying probe testing).
Choose High-Quality Materials
Use industry-grade substrates (FR-4, PI) and printing materials (solder paste, conductive ink) that meet sector-specific standards (e.g., IEC 60601 for medical, ISO 16750 for automotive).
How to Print PCB Board with Custom Requirements?
Many projects require custom solutions for printing a PCB board (e.g., unique sizes, high-precision traces, industry-specific materials). We specialize in custom PCB printing, with solutions tailored to your exact needs.
We support custom on-demand manufacturing + free DFM reports, ensuring your custom printed PCB boards meet your design requirements and industry standards before production begins.
We provide professional PCB printing services, including prototype and mass production printing for all industries. If you need high-quality printed PCB boards, contact us at sales@pcbtry.com to place an order with Thindry. We support custom on-demand manufacturing + free DFM reports, ensuring your project is a success.

0 Comments