
Soldering to a PCB is a fundamental skill for anyone working with electronic components, and mastering how to solder to a PCB ensures reliable electrical connections and long-lasting PCB performance. This guide breaks down how to solder to a PCB clearly, with step-by-step instructions, pro tips, and industry-specific examples to help you avoid costly errors like cold solder joints and solder bridges. Whether you’re working on small prototypes or large-scale production, these techniques will improve your PCB soldering quality and efficiency, making your projects more reliable.
What Tools Do You Need to Solder to a PCB?
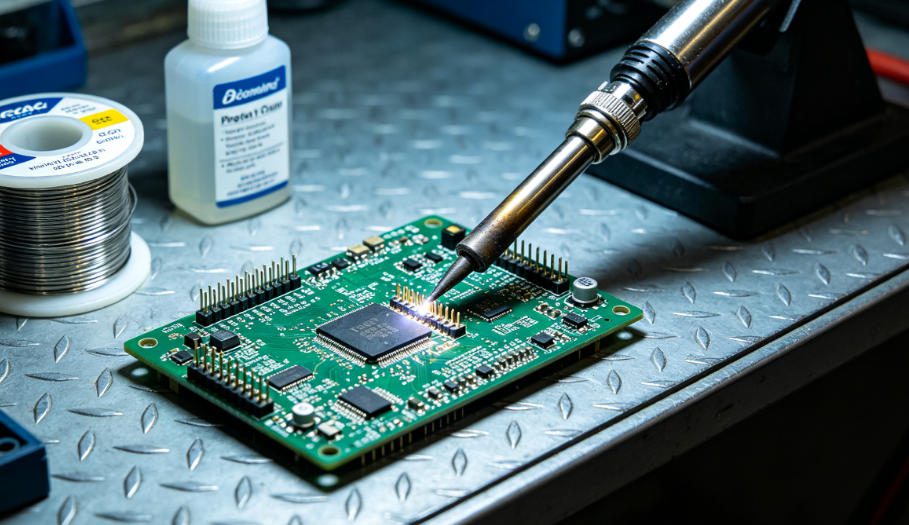
To solder to a PCB effectively, you need a few essential tools—no fancy equipment is required for basic PCB soldering projects. The core tools include a soldering iron (30-60W for most PCBs), lead-free solder wire (SAC305 is the industry standard), flux, a soldering iron stand, tweezers, and alcohol wipes for cleaning after soldering to a PCB.
For precision SMD PCB soldering (such as small SMD components), add a magnifying glass or soldering microscope. For production environments, a temperature-controlled soldering station is recommended to maintain consistent heat and prevent component damage during soldering to a PCB.
What’s the Correct Step-by-Step Process to Solder to a PCB?
Step 1: Prepare the PCB and Components
Start by cleaning the PCB pads and component leads with alcohol wipes to remove oxidation—oxidation causes poor solder adhesion and cold solder joints, a common issue when soldering to a PCB. If leads are heavily oxidized, lightly sand them until they shine, then wipe them clean again to ensure smooth PCB soldering results.
Step 2: Heat the Soldering Iron
Set your soldering iron to 260-280°C (lead-free solder requires higher heat than leaded solder when soldering to a PCB). Let it heat up fully (3-5 minutes) and tin the tip—melt a small amount of solder on the tip to improve heat transfer, a key step for successful PCB soldering.
Step 3: Position the Component
Use tweezers to hold the component firmly on the PCB pads, ensuring the pins align perfectly with the pads. For through-hole components, insert the leads through the PCB holes and bend them slightly to hold the component in place.
Step 4: Apply Heat and Solder
Touch the soldering iron tip to both the PCB pad and component lead simultaneously. Hold it for 1-2 seconds to heat both surfaces evenly, then feed solder wire to the joint (not the iron tip) until the solder covers the pad and forms a smooth, cone-shaped joint—this is the ideal solder joint for PCB connections.
Step 5: Cool and Inspect
Remove the solder wire first, then the soldering iron. Let the joint cool for 1-2 seconds (do not touch it—this will cause damage). Inspect the joint for smoothness, full pad coverage, and no gaps or bridges to ensure high-quality PCB soldering work.
Which Solder Type Is Best for Soldering to a PCB?
The best solder for soldering to a PCB depends on your application, but lead-free solder (SAC305: 96.5% tin, 3% silver, 0.5% copper) is the industry standard for most PCB soldering projects. It is compliant with environmental regulations and provides strong, reliable solder joints for PCB connections.
| Solder Type | Best For | Pros | Cons |
|---|---|---|---|
| Lead-Free (SAC305) | Most PCB projects, production, consumer electronics | Environmentally compliant, strong joints, widely compatible | Higher melting point (217°C), requires more precise heat control |
| Leaded (Sn63/Pb37) | Prototyping, hobby projects, legacy equipment | Lower melting point (183°C), easier to work with | Not environmentally compliant; banned in most production |
| Flux-Core Solder | All PCB soldering (beginner to pro) | Built-in flux reduces oxidation and simplifies the process | Requires post-soldering cleaning for sensitive components |
How to Solder SMD Components to a PCB Without Errors?
Soldering SMD (surface-mount device) components to a PCB requires precision, but following these steps will help you avoid common mistakes in SMD PCB soldering. Start by applying a small amount of flux to the PCB pad to improve solder adhesion, a critical step for successful soldering to a PCB.
Use tweezers to place the SMD component precisely on the pad. Hold the soldering iron tip to one end of the component lead and the pad, feed a small amount of solder to secure it, then repeat the process on the other end. Use a magnifying glass to ensure there are no bridges between the leads.
For fine-pitch SMD components (0.4mm pitch or smaller), use a soldering iron with a fine tip and apply solder in small increments to prevent bridging. We offer custom PCB solutions and free DFM reports to help optimize SMD pad design for easier, more reliable soldering to a PCB.
How to Solder to a PCB in Different Industry Applications?
1. Consumer Electronics
In smartphones and smart wearables, PCBs are small and dense. We specialize in soldering FPC (flexible PCB) to camera modules, solving the challenge of connecting tiny, flexible components to rigid PCBs while maintaining signal integrity—critical for consumer electronics PCB soldering.
2. Automotive Electronics
Automotive PCBs require high-temperature resistance. We excel in soldering power management PCBs for electric vehicle (EV) battery systems, ensuring joints withstand extreme temperatures and vibration without failure—key for automotive PCB soldering reliability.
3. Industrial Control/Automation
Industrial PCBs often have both through-hole and SMD components. We provide expert soldering for I/O interface PCBs for factory automation equipment, solving issues with poor solder joints caused by industrial dust and temperature fluctuations—common in industrial PCB soldering.
4. Medical Electronics
Medical PCBs demand ultra-clean soldering. We deliver precise soldering for PCBAs for portable medical monitors, ensuring no flux residue or solder splatter that could compromise device sterility and reliability—essential for medical PCB soldering standards.
What’s the Difference Between Hand Soldering and Machine Soldering to a PCB?
Hand soldering is ideal for prototyping, small batches, and repairs, while machine soldering (reflow or wave soldering) is better for large-scale production. The table below breaks down their key differences for PCB soldering efficiency and quality.
| Feature | Hand Soldering | Machine Soldering (Reflow/Wave) |
|---|---|---|
| Speed | Slow, labor-intensive | Fast, high-volume |
| Consistency | Depends on operator skill | Highly consistent and repeatable |
| Best For | Prototypes, repairs, small batches | Mass production, SMD components |
| Cost (Setup) | Low (no setup fees) | High (equipment and setup costs) |
How to Fix Common Soldering Mistakes on a PCB?
1. Fixing Solder Bridges
Solder bridges (short circuits between adjacent pads) are fixed by heating the bridge with the soldering iron and using a desoldering braid to absorb excess solder. For fine-pitch components, use a fine-tip iron to avoid spreading the bridge—a common fix for PCB soldering mistakes.
2. Fixing Cold Solder Joints
Cold solder joints (dull, grainy, or cracked) occur due to insufficient heat, one of the most common issues when soldering to a PCB. Reheat the joint, add a small amount of flux, and feed fresh solder to form a smooth, shiny joint—critical for reliable PCB soldering.
3. Fixing Pad Lifting
Pad lifting (when a PCB pad peels off) happens due to overheating during soldering to a PCB. Stop heating immediately, clean the area, and use a small amount of epoxy to reattach the pad if possible. For critical applications, replace the PCB to maintain PCB soldering quality.
How to Ensure Soldering to a PCB Meets Industry Standards?
To meet industry standards (IPC-7351, IPC-A-610, IPC-J-STD-005), focus on three key areas: clean joints, proper solder coverage, and no defects. Use lead-free solder for compliance, and inspect joints with a magnifying glass or AOI (Automated Optical Inspection) tool for professional PCB soldering.
Follow standard operating procedures (SOPs) for temperature control and soldering time to ensure consistent results when soldering to a PCB. We offer custom PCB solutions and free DFM reports to help design PCBs that are easy to solder and meet industry standards for high-quality PCB soldering.
FAQ: Common Questions About How to Solder to a PCB
1. What temperature should I use to solder to a PCB?
For lead-free solder (SAC305), use 260-280°C; for leaded solder (Sn63/Pb37), use 240-260°C. Adjust the temperature based on component size—smaller components need lower heat to avoid damage, a key tip for safe PCB soldering.
2. Do I need flux to solder to a PCB?
Yes, flux is essential for soldering to a PCB. It removes oxidation from pads and component leads, improves solder flow, and prevents cold joints—critical for successful PCB soldering. Use rosin-based flux for most applications (it is non-corrosive).
3. How to solder to a PCB without damaging components?
Use a temperature-controlled soldering iron, limit heat exposure to 1-2 seconds per joint, and use tweezers to hold heat-sensitive components (such as ICs) to dissipate heat. Avoid applying excessive pressure to PCB pads—these steps prevent damage when soldering to a PCB.
4. Can I solder to a PCB with a broken pad?
Yes, you can solder to a PCB with a broken pad if the underlying copper trace is intact. Clean the trace, apply flux, and solder the component lead directly to the trace. For severe damage, use a jumper wire to connect the component to a nearby pad—a practical fix for PCB soldering with broken pads.
5. How to clean a PCB after soldering?
Use isopropyl alcohol (90%+ concentration) and a lint-free cloth or cotton swab to wipe away flux residue. For sensitive components (such as sensors), use a mild, non-corrosive cleaner to avoid damage—an important step after soldering to a PCB.
6. What’s the best way to solder through-hole components to a PCB?
Insert the component leads through the PCB holes, bend the leads slightly to secure the component, heat the pad and lead with the iron, feed solder until the pad is covered, then trim excess leads with wire cutters after cooling—the best method for soldering through-hole components to a PCB.
How to Choose the Right PCB for Soldering?
Choose a PCB with an appropriate surface finish—ENIG (Electroless Nickel Immersion Gold) is best for precision soldering, while OSP (Organic Solderability Preservative) is cost-effective for basic projects. Ensure the PCB thickness and copper weight match your component requirements for optimal PCB soldering results.
For high-temperature applications (automotive, industrial), select a PCB with a high Tg (glass transition temperature) of ≥150°C to prevent warping during soldering to a PCB. We offer custom PCBs optimized for easy soldering, with custom solutions and free DFM reports to enhance PCB soldering efficiency.
How to Improve Soldering Quality for PCB Mass Production?
For mass production, use automated reflow soldering with a precise temperature profile tailored to your solder and components, following IPC-J-STD-005 standards. Implement AOI to inspect every joint, and train operators on proper hand soldering techniques for repairs—key steps for mass production PCB soldering.
Optimize PCB design for manufacturability (DFM)—ensure pad sizes follow IPC standards, avoid tight spacing between components, and add fiducial marks for accurate component placement. Our DFM reports help identify and fix design issues before production, improving PCB soldering quality and reducing defects.
Final Tips for Mastering How to Solder to a PCB
Practice on scrap PCBs first to build confidence—consistency is key to mastering how to solder to a PCB. Keep your soldering iron tip clean and tinned, use quality tools and materials, and always inspect joints after soldering. For complex projects or high-volume production, partner with a trusted supplier for reliable PCB soldering results.
We provide products and services for how to solder to a PCB, including custom PCBs, solder materials, and professional support for all types of PCB soldering projects. If you need assistance with your soldering project or require custom solutions, contact us at sales@pcbtry.com. We offer custom PCB solutions and free DFM reports to ensure your PCB soldering process is efficient and error-free.


0 Comments